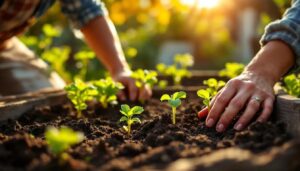

As spring takes hold and the garden wakes back up, the instinct to buy new pots, trays, and planters kicks in fast. But before heading to the garden center, it's worth looking at what's already sitting in the recycling bin. Toilet paper tubes — cardboard, lightweight, and biodegradable — turn out to be genuinely useful when starting seeds and protecting young plants in late March, when the soil is still cold and frosts haven't entirely packed their bags.
These four methods are low-effort, zero-cost, and grounded in practical gardening logic rather than craft-project novelty. Each one solves a real problem that comes up in the spring garden — whether you're direct sowing, raising seedlings indoors, or trying to protect tender shoots from slugs and cutworms. Time to pull those tubes out of the bin and put them to work.
| Preparation time | 5–10 min per method |
| Completion time | 15–30 min total |
| Difficulty | Beginner |
| Recommended season | Spring (March–May) |
| Estimated cost | $0 — materials already at hand |
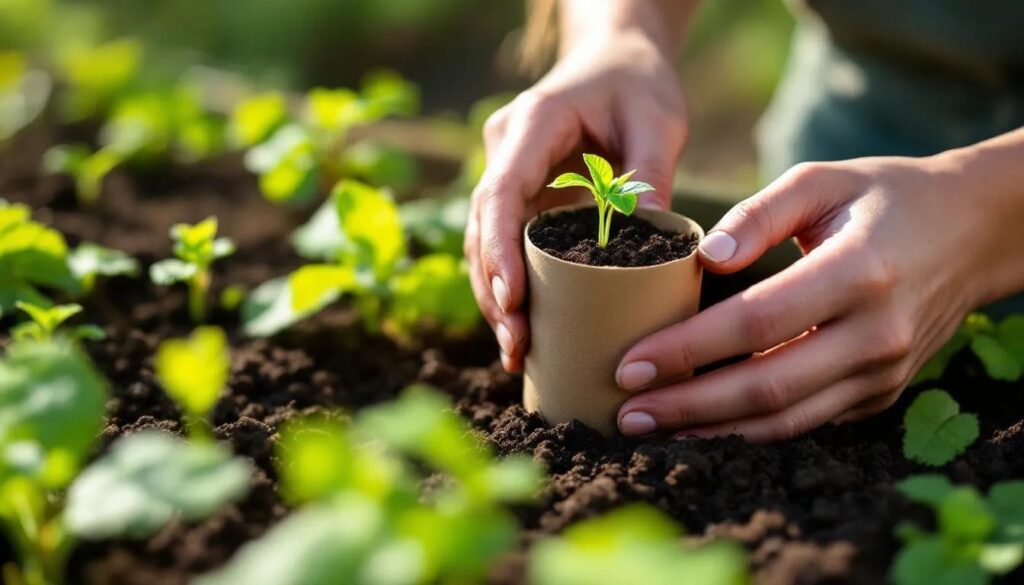
1. Biodegradable Seed Starting Pots
This is the most straightforward use, and one of the most practical. Stand your toilet paper tubes upright in a tray, fill each one with seed-starting compost, sow one or two seeds per tube, and water gently. The cardboard retains just enough moisture without becoming waterlogged, and it breaks down naturally in the soil when transplanting time comes — meaning you plant the whole thing, tube and all, without disturbing the roots.
This matters most with plants that resent root disturbance: sweet peas, nasturtiums, courgettes, beans, and sunflowers are all strong candidates. With peas especially, the long root system benefits from a deeper container, and a toilet paper tube offers just enough depth for the first two or three weeks of growth. To keep the bottom closed, make four small cuts around the base of the tube and fold the flaps inward — the resulting base holds compost without the need for tape or staples. Once seedlings are ready to go out, plant them with the tube intact. The cardboard softens within a week or two underground, and roots push through without any shock.
In late March, nights can still drop close to freezing, so keep your filled tubes on a warm windowsill or in a heated propagator until outdoor temperatures stabilize. Label each tube clearly — pencil on masking tape works well — because seedlings are nearly impossible to tell apart before the first true leaves appear.
2. Cutworm and Slug Collars
Cutworms and slugs cause a specific, frustrating kind of damage: they sever young seedlings at soil level overnight, leaving nothing but a limp stalk by morning. A simple physical barrier stops them cold. Cut a toilet paper tube lengthwise into two or three rings, each about 3–4 cm wide. Press each ring about 2 cm into the soil around a newly transplanted seedling, leaving 2–3 cm above ground. The cardboard creates a collar that cutworms — which travel through the top layer of soil — cannot easily cross, and it raises the stem above the surface where slugs tend to strike.
This technique works particularly well around brassica seedlings, young lettuces, and pepper transplants going out in spring. The collar doesn't need to last the entire season — just the first three to four weeks after transplanting, when plants are most vulnerable and before stems have toughened up. By the time the cardboard starts to soften and break down in wet spring soil, the plants are generally robust enough to fend for themselves. Push the ring firmly enough that it doesn't tip over in wind or rain, but avoid compacting the soil immediately around the stem.
3. Directed Watering Tubes for Deep-Rooted Plants
Shallow watering is a persistent spring gardening problem. Water lands on the surface, the top centimeter of soil feels damp, and the roots sitting 10–15 cm below stay dry. Tomatoes, courgettes, and climbing beans all develop deep root systems that benefit far more from water delivered directly to the root zone than from surface irrigation.
Before transplanting or direct sowing, push a toilet paper tube vertically into the soil next to where the plant will sit, leaving just the top 2–3 cm above the surface. When watering, aim directly into the tube. The water travels straight down through the cardboard — which is porous enough to allow slow seepage — and delivers moisture where roots are actually growing. As the season progresses and the tube degrades, it creates a soft channel in the soil that continues to guide water downward. This method is especially useful in raised beds where compost-heavy mixes can crust over on the surface and shed water sideways rather than absorbing it. Pair it with a watering can fitted with a long spout for the most accurate delivery.
4. Seed Tape Alternative for Fine Seeds
Sowing tiny seeds — carrot, parsnip, lettuce, radish — at the right spacing is genuinely difficult. They clump together, they stick to wet fingers, and they end up sown far too densely, requiring tedious thinning later. A toilet paper tube, unrolled and flattened, provides a short strip of thin, moist-able cardboard that behaves very similarly to commercial seed tape.
Unroll the tube carefully along its glued seam to get a flat strip of cardboard. Dampen it lightly with a spray bottle. Place seeds at the correct spacing for the variety — typically 2–3 cm apart for radishes, 5–8 cm for carrots — pressing each one gently into the damp surface so it adheres. Fold the strip loosely, allow it to dry for 20–30 minutes so seeds stick without germinating, then store flat until you're ready to sow. In the garden, lay the strip in a prepared drill at the correct depth, cover with fine soil, and water in. The cardboard breaks down within days in moist spring soil, releasing seeds at even spacing without any further thinning needed for most varieties.
This works best with seeds sown outdoors directly into well-prepared beds — which in late March often means waiting for a dry window between showers to get a fine tilth on the surface.
The Professional's Tip
Store toilet paper tubes in a dry place throughout winter so they're genuinely dry and structurally sound by the time spring arrives. Tubes that have been compressed or left in a damp bathroom cupboard lose their rigidity and won't hold compost or stand upright in a tray without support. If you're short on tubes in early spring, kitchen roll tubes cut in half give you two deep pots per roll — ideal for sweet peas and beans that appreciate the extra root depth in those first cold weeks of March.
Long-Term Use and Composting
Any tubes that don't make it into the garden directly — broken ones, leftover scraps from cutting collars — go straight onto the compost heap. Cardboard is a valuable brown material (high carbon content) that balances the nitrogen-rich green waste from spring garden tidying: cut grass, soft prunings, pulled weeds. Tear the tubes into smaller pieces before adding them to speed up decomposition.
None of these four methods requires any ongoing maintenance. The cardboard does its job and disappears into the soil or the compost, leaving no residue and no cleanup. At the end of the season, the only thing left is healthier soil and better-established plants.
Going Further
For gardeners who generate a larger volume of cardboard waste — cereal boxes, egg cartons, packaging — the same logic applies across a wider range of containers. Egg cartons make excellent 12-cell seed trays for smaller seeds, while folded newspaper pots can be sized to match almost any transplant requirement. The principle in each case is the same: biodegradable material that does a job and then vanishes into the soil without leaving anything behind.
No planning permission or special regulations apply to any of these methods. They work equally well in allotments, private gardens, raised beds, balcony containers, and community garden plots. The only real prerequisite is a supply of tubes and a garden that needs something planted in it — which, in late March, is rarely in short supply.
| Method | Best for | How long the tube lasts |
|---|---|---|
| Seed starting pots | Beans, sweet peas, courgettes | 2–4 weeks (planted with seedling) |
| Cutworm collars | Brassicas, lettuces, peppers | 3–5 weeks in moist soil |
| Deep watering tubes | Tomatoes, climbing beans | Full season (degrades gradually) |
| Seed tape strips | Carrots, radishes, lettuces | Days after sowing |
Frequently Asked Questions
Will the cardboard go moldy before seedlings are ready to transplant?
In warm, humid conditions indoors, some surface mold can appear on the outside of the tube — particularly if trays are overwatered or poorly ventilated. This surface mold is generally harmless to seedlings and doesn't penetrate to the roots. To minimize it, water from the bottom by placing the tray in a shallow dish of water rather than pouring from above, and ensure good airflow around the tubes. Mold becomes less of an issue once daytime temperatures warm up and trays can be moved to a brighter, airier spot.
How many tubes do I need to get started?
For a modest spring seed-sowing setup — say, 20–30 seedlings across a few varieties — 20 tubes is a reasonable starting point, factoring in some for collars and a few extras. If you're sowing in stages (which is good practice for lettuces and radishes to stagger harvests), collect tubes over a couple of weeks rather than waiting until you have a large stockpile. A household of two people typically generates enough tubes for one solid round of spring sowing within two to three weeks.
Can I use paper towel or kitchen roll tubes instead?
Yes — and in some cases they work better. Kitchen roll tubes are longer, which makes them particularly suited to deep-rooted plants like sweet peas and parsnips. Cut them in half for standard seed-starting pots, or use them at full length for plants that need more root depth from the start. The cardboard is the same material and breaks down at the same rate in the soil.
Do the tubes need to be treated or prepared in any way before use?
No treatment is needed. Use them dry and clean as they come. Avoid tubes that have been exposed to cleaning products or bleach, as these can affect the soil immediately around the tube — though in practice this is rarely a concern with standard household toilet paper packaging. Plain, unprinted cardboard is ideal, but the small amount of ink used in standard toilet paper branding has no meaningful impact on soil or plant health at this scale.
What's the best way to keep tubes upright in a seed tray?
Pack them tightly together in a shallow tray or box — mutual support is the most reliable method, and it also helps retain moisture more evenly across the group. A standard seed tray fits approximately 15–20 tubes standing upright, depending on tube diameter. Once filled with compost, the added weight stabilizes them further. If a few tubes at the edges still lean, wedge small folded pieces of cardboard between the outer tubes and the tray wall to hold them vertical.