
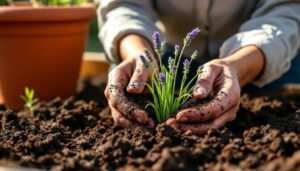

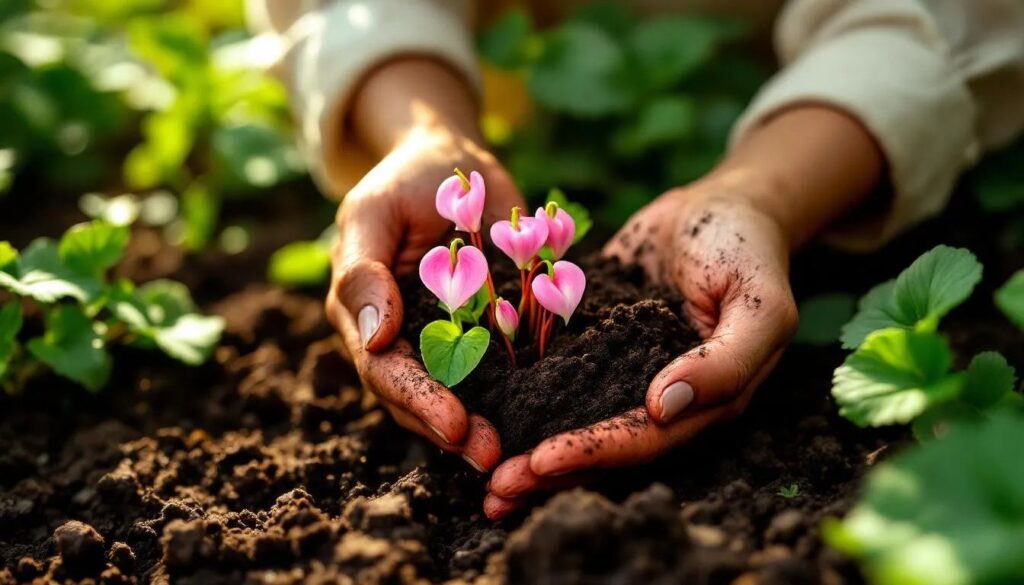
Spring is arriving, and with it comes one of the garden's most quietly dramatic performers: the bleeding heart. As temperatures climb past the last frost and the soil finally loosens, Lamprocapnos spectabilis — still widely known by its former name Dicentra spectabilis — sends up its arching stems tipped with those signature pendant blooms in pink, red, or white. Getting the timing right this spring makes the difference between a plant that thrives for decades and one that sulks through the season.
Bleeding heart plants reward attentive early care more than almost any other shade-garden perennial. The five actions outlined here cover everything from soil preparation to post-bloom management, giving your plants the foundation they need for lush growth now and reliable returns next year. Dig out your gloves and a good pair of hand pruners — the season has started.
| Time required | 30 min to 1 hour per task |
| Difficulty | Beginner |
| Recommended season | Early to mid-spring (March–April) |
| Frequency | Once per year, as growth emerges |
| Estimated annual cost | USD $15–$45 (mulch, fertilizer, compost) |
Safety note: All parts of the bleeding heart plant are toxic if ingested. Wear gloves when handling roots, stems, or foliage, and wash hands thoroughly after working with the plant. Keep children and pets away from the work area.
What You Will Need
Materials and supplies
- Organic compost or well-rotted leaf mold
- Slow-release balanced fertilizer (e.g., 10-10-10) or organic granular fertilizer
- Organic mulch: shredded bark, wood chips, or composted leaves
- Liquid or granular balanced fertilizer low in nitrogen for a mid-spring feed
Tools
- Hand fork or garden fork
- Trowel
- Sharp hand pruners or garden scissors
- Watering can with a rose head or garden hose with gentle spray setting
- Gardening gloves
The Five Essential Spring Tasks
1. Clear the bed and inspect last year's crown
As soon as the soil is workable in late March, clear away any debris left from the previous autumn — dead stems, fallen leaves from overhanging trees, or winter mulch that has matted down and started to block light from emerging shoots. Bleeding heart crowns push their first growth very early in spring, and compacted debris sitting directly over the crown can delay emergence or encourage fungal rot in the cool, damp conditions that characterise early spring in most temperate climates.
Use your hands or a soft hand fork to remove material gently, working outward from the crown rather than toward it. Look for the pale pink or red nubs of new growth just breaking through the surface — these are fragile, and a careless fork thrust can snap them off. Once the area is cleared, inspect the crown itself: a healthy crown is firm to the touch and shows no signs of mushy tissue or foul smell. Soft spots can indicate crown rot, usually caused by poorly drained soil sitting wet over winter. If rot is limited to one area, remove the affected portion with a clean blade and allow the cut surface to air-dry for a few hours before treating the exposed tissue with a dusting of powdered sulphur or cinnamon as a natural antifungal barrier.
2. Amend the soil with compost before growth takes off
Bleeding heart plants perform best in humus-rich, moisture-retentive but well-drained soil with a slightly acidic to neutral pH — roughly between 6.0 and 7.0. Spring is the single best window to top-dress the root zone with compost because the roots are actively expanding and will draw nutrients directly from the improved soil as the plant puts on its main flush of growth.
Apply a 3 to 5 cm layer of well-rotted compost or leaf mold around the base of the plant, spreading it in a ring that starts about 5 cm from the crown and extends to just beyond the drip line of last year's foliage. Work it in very lightly with a trowel — no deeper than 5 cm — to avoid disturbing the shallow, brittle roots. Avoid heavy clay amendments or fresh manure at this stage: the first compacts drainage; the second delivers too much nitrogen too fast, which pushes leafy growth at the expense of blooms.
3. Apply a balanced slow-release fertilizer
Compost provides organic matter and trace minerals, but a targeted feed at the beginning of spring ensures your bleeding heart has the phosphorus and potassium it needs for strong stem development and abundant flowering. Choose a slow-release granular fertilizer with a balanced NPK ratio — a 10-10-10 or an organic alternative such as bone and blood meal blend works well here.
Scatter the granules according to the manufacturer's rate across the amended soil surface, keeping them at least 8 cm from the crown to avoid fertilizer burn on emerging tissue. Water in immediately with a gentle spray to begin activating the granules. Resist the temptation to over-fertilize: excessive nitrogen produces lush, soft growth that is more vulnerable to aphid attack and tends to collapse under the weight of the blooms. One application in early spring is sufficient for most established plants; younger plants in their first or second season may benefit from a second half-strength liquid feed in late April as buds begin to form.
4. Mulch to lock in moisture and regulate soil temperature
Spring soil temperatures in March and April can swing dramatically between warm daytime highs and near-freezing nights. These fluctuations stress shallow-rooted perennials, and bleeding heart roots sit close enough to the surface to be genuinely affected. A consistent 5 to 8 cm layer of organic mulch applied after your compost and fertilizer moderates these swings and dramatically reduces moisture loss during any dry spells that arrive before the reliable spring rains establish themselves.
Shredded bark, wood chips, or a generous layer of composted leaves all work well. Spread the mulch in a ring around the plant, following the same boundary used for your compost application, and leave a clear collar of at least 5 cm around the base of the crown. Mulch packed against the crown creates the warm, moist conditions that fungal pathogens require. As the season progresses, the organic mulch will break down slowly, adding further structure to the soil and contributing to the humus-rich environment that bleeding heart plants prefer.
5. Plan your post-bloom strategy before the foliage disappears
This step is easy to overlook in spring when the plant looks magnificent, but failing to plan for what comes after flowering causes real problems. Traditional bleeding heart cultivars go dormant by midsummer — the foliage turns yellow and dies back completely by June or July, leaving a noticeable gap in the border. The mistake most gardeners make is either cutting the foliage back too early, which starves the rhizome of the energy it needs to build next year's flower buds, or leaving the dying stems so long that they shade out neighbouring plants.
The correct approach is to let the foliage yellow naturally and only remove stems once they pull away cleanly with minimal resistance — usually six to eight weeks after flowering has finished. In the meantime, mark the location of the crown with a small stake or garden label so you do not accidentally drive a fork through the dormant rhizome later in summer when planting annuals or autumn bulbs. Consider pairing your bleeding heart with later-emerging companions — hostas, ferns, or astilbes — positioned close enough to fill the gap as the bleeding heart fades. These plants thrive in the same moist, shaded conditions and produce their best growth precisely when bleeding heart begins to retreat.
Professional Tip
Early spring — when bleeding heart crowns are just emerging — is also the safest moment to divide an overcrowded plant. Lift the clump with a fork, separate the rhizomes by hand or with a clean blade, and replant the divisions immediately at the same depth they were growing. Each division should have at least two or three growth buds. Water them in well and apply mulch. Dividing in spring rather than autumn gives the new sections an entire growing season to establish before their first winter, dramatically improving survival rates in colder regions.
Ongoing Care Through the Season
Once your five spring tasks are complete, bleeding heart requires relatively little intervention until dormancy. Keep the soil consistently moist but never waterlogged during the flowering period — dry conditions accelerate dormancy. A second liquid feed in late April is worthwhile for plants that seemed weak coming out of winter. Deadheading spent blooms has minimal effect on re-blooming for traditional varieties but keeps the display looking clean; leave a few seedheads if you want the plant to naturalise gradually through the border.
Watch for aphid colonies forming on young stems in April and May — a firm spray of water dislodges them in most cases. Slugs are drawn to the emerging shoots in cool, wet springs; a ring of sharp grit around the crown or an iron phosphate-based slug deterrent provides reliable protection without harming soil biology.
Going Further
If traditional Lamprocapnos spectabilis goes dormant faster than suits your garden design, the fringed bleeding heart — Dicentra eximia and its cultivars — offers a more compact habit and blooms sporadically from spring through autumn without fully disappearing. 'King of Hearts' and 'Luxuriant' are widely available and hold their foliage through summer in all but the hottest climates. Everblooming types such as Dicentra 'Gold Heart' also provide striking golden foliage as a secondary ornamental feature.
No permits or regulations apply to growing or dividing bleeding heart in domestic gardens, but it is worth noting that the plant is considered mildly invasive in some Pacific Northwest states due to prolific self-seeding. If you garden in Oregon, Washington, or British Columbia, deadheading before seeds set is a straightforward precaution.
Estimated Spring Care Cost
| Product | Approximate cost (USD) | Coverage |
|---|---|---|
| Bag of compost or leaf mold (40 L) | $8–$14 | 3–4 plants |
| Slow-release balanced fertilizer (1 kg) | $10–$18 | Multiple plants, full season |
| Shredded bark mulch (50 L bag) | $7–$12 | 2–3 plants |
| Iron phosphate slug deterrent | $9–$15 | Whole bed, as needed |
Frequently Asked Questions
When exactly should I start these spring tasks?
Begin as soon as the soil is no longer frozen and you can work it without compacting it underfoot — typically late March in most temperate zones of the continental United States and the United Kingdom. The first signs of crown emergence are your clearest signal: once those pale shoots appear, the plant is ready to respond to feeding, mulching, and soil improvement. Do not wait until the stems are fully developed, as the window for soil amendment without root disturbance narrows quickly.
My bleeding heart did not come back this spring — is it dead?
Not necessarily. Bleeding heart can be slow to emerge, particularly after a harsh winter or if the crown was planted in soil that retained excess moisture. Wait until mid-April before concluding the plant has been lost. Gently probe the soil around where the crown should be with a finger or a thin stake — a firm, intact rhizome is a good sign. If the rhizome is completely mushy, crown rot caused by poor winter drainage is the most likely cause, and replanting in improved, better-drained soil is the appropriate response.
Can I grow bleeding heart in full sun?
Traditional bleeding heart cultivars strongly prefer partial to full shade, particularly afternoon shade in warmer regions. In cool northern gardens — USDA zones 3 to 5 — morning sun with afternoon shade is acceptable and can encourage more prolific flowering. In zones 6 and above, direct midday and afternoon sun accelerates dormancy significantly, sometimes triggering it as early as May. Fringed bleeding heart types handle more sun exposure than their larger cousins but still perform best with some protection from intense afternoon light.
Should I cut back the stems before or after the plant goes dormant?
Always after — and only once the stems detach easily when you tug them gently. Cutting the foliage while it is still green, even if it looks untidy, interrupts the process by which the plant transfers energy reserves back down into the rhizome for storage over winter and summer dormancy. Cutting too early in consecutive years noticeably reduces flowering and can eventually weaken the plant to the point of non-return. If the dying foliage bothers you aesthetically, use companion plantings to mask it rather than removing it prematurely.
How often should I divide my bleeding heart?
Established bleeding heart plants generally do not need division for performance reasons — unlike many clump-forming perennials, they do not degrade noticeably when left undisturbed for years. Divide when you want to propagate new plants, when the clump has grown beyond its allotted space, or when flowering has declined noticeably after several seasons. Early spring, at crown emergence, gives the best results. Divisions can also be taken in late summer to early autumn in cooler climates, though spring division gives plants more time to establish before their first winter dormancy.