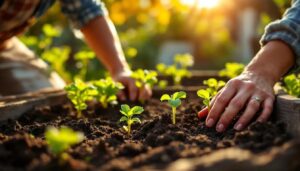

Spring is here, and seed trays across the country are bursting with tiny green shoots. After weeks of carefully sown seeds, bottom watering, and patient waiting under grow lights or on warm windowsills, the moment every gardener faces arrives: a crowded tray of seedlings, all competing for light, space, and nutrients. The question of whether to thin them — pulling out healthy-looking plants to make room for others — feels counterintuitive, even painful.
Thinning is one of those gardening tasks that looks like destruction but functions as investment. Getting it right in early spring, when seedlings are still young and roots shallow, makes the difference between a productive growing season and a tangle of stunted plants that never reach their potential. This guide covers when thinning is genuinely necessary, when it can be skipped, and exactly how to do it without damaging the survivors.
| Time required | 10–30 min depending on tray size |
| Difficulty | Beginner |
| Recommended season | Spring — March to May, as soon as seedlings show their first true leaves |
| Tools needed | Small scissors or fingernails, pencil or dibber, watering can |
What Thinning Actually Does
When multiple seeds germinate in the same small pocket of soil, each seedling begins drawing on the same limited pool of water, nutrients, and light. In the early days, this competition is invisible — the seedlings look fine. But beneath the surface, root systems are already tangling and restricting each other's development. Above ground, overcrowded seedlings stretch upward too quickly in search of light, producing weak, leggy stems that are more vulnerable to damping off, the fungal condition that causes young plants to collapse at the base.
Thinning removes the weaker competitors so that the strongest plant in each cell or cluster can develop a robust root system, thick stem, and healthy leaf canopy. The result is a plant that establishes faster after transplanting, resists stress better during summer heat, and ultimately produces more — whether that means more tomatoes, more basil leaves, or more zinnia flowers.
When You Can Skip Thinning
Not every seedling situation calls for thinning. If you sowed seeds individually into separate module cells and only one germinated per cell, there is nothing to thin. The same applies when you are growing microgreens or sprouts, where dense, close-cropped growth is precisely the point.
Some direct-sown crops tolerate — or even benefit from — growing in loose clusters for a period. Spring onions and chives, for instance, are commonly grown in small clumps without issue. Cut-and-come-again salad leaves sown in a broadcast pattern across a bed are harvested before competition becomes a serious problem.
The genuine need for thinning arises with crops that require individual development: carrots, beetroot, parsnips, lettuces forming hearts, sunflowers, sweetcorn, cucumbers, squash, and most flowers grown for cutting. For these, allowing multiple plants to compete in the same space consistently produces disappointing results.
Reading the Right Moment
The optimal window for thinning is when seedlings display their first set of true leaves — the second pair to emerge, which carry the characteristic shape of the mature plant, as opposed to the rounded seed leaves, known as cotyledons, that appear first. At this stage, roots are still short, soil disturbance is minimal, and the selected survivors have enough time to recover and resume steady growth.
Waiting too long makes the job harder. Roots intertwine, and pulling out one seedling drags the neighbour's roots with it. If thinning is overdue, the scissors method — cutting unwanted seedlings at soil level rather than pulling them — causes far less disruption to the roots of the plant being kept.
How to Thin Seedlings Properly
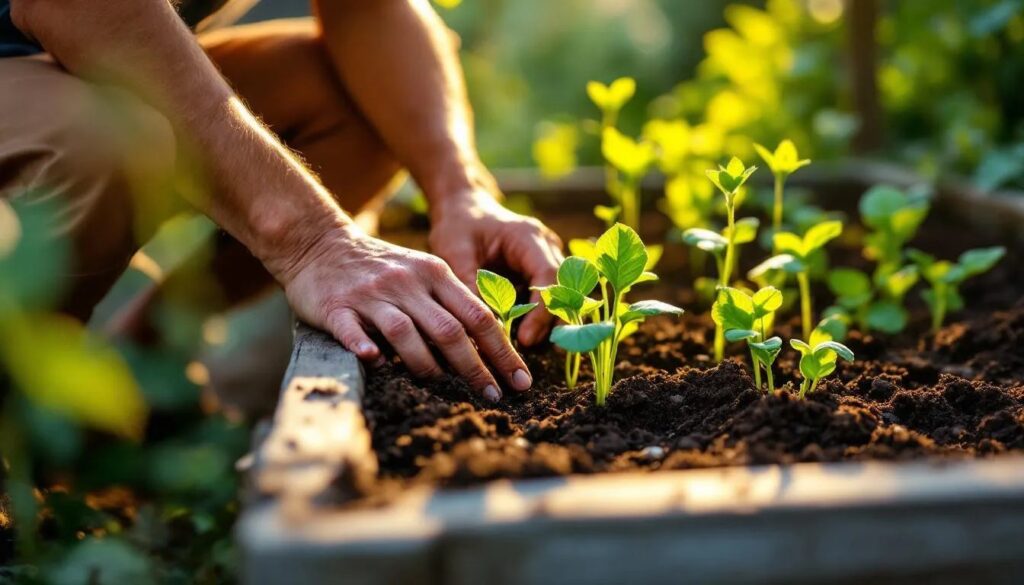
1. Identify the strongest plant in each cluster
Look for the seedling with the thickest stem at soil level, the most upright posture, and leaves that are a deep, even green with no yellowing, spotting, or distortion. Avoid the tallest seedling if it has a noticeably thin stem — height without substance is a sign of stretching toward light, not vigour. In a module tray, you are selecting one plant per cell; in a direct-sown row, you are spacing survivors according to the final spacing recommended for that crop — typically printed on the seed packet.
2. Remove unwanted seedlings cleanly
Use small, sharp scissors to snip unwanted seedlings at soil level. This is the safest method when seedlings are densely packed. If spacing is generous enough to allow careful extraction, moisten the compost first, then hold the soil gently with one finger while easing out the unwanted plant with the other hand. A thin dibber or pencil can help lever roots free without jerking. Never simply pull: the suction and tug can uproot the neighbouring plant you intend to keep.
3. Firm and water in the survivors
After thinning, the remaining seedlings may sit slightly loosened in their compost. Press the soil gently around each stem to restore contact between roots and growing medium — a gap between root and compost, even a small one, interrupts water and nutrient uptake. Water using a fine rose or a gentle bottom-watering method to avoid dislodging the newly settled plants. The surface of the compost should be evenly moist but never waterlogged.
4. Check spacing for direct-sown crops
For vegetables sown directly into the garden bed — carrots, beetroot, radishes, parsnips — thinning happens in stages. A first thin reduces dense clumps when the true leaves appear; a second thin to final spacing follows two to three weeks later when it becomes clearer which plants are performing best. Final spacings vary considerably: radishes need as little as 5 cm between plants, while large beetroot varieties need 10 cm and parsnips up to 15 cm.
The Pro Tip
In early spring, when nighttime temperatures are still dropping and seedlings are under the stress of variable conditions, avoid thinning on the same day as transplanting or repotting. Give disturbed seedlings one calm, settled day in stable conditions before adding further stress. Thin in the morning so that any minor root disturbance has the full warmth of the day to recover rather than sitting in cold, damp conditions overnight. The seedlings removed from module trays are not always waste: larger, intact thinnings from spacious cells — particularly lettuces, basil, or leeks — can sometimes be carefully transplanted into fresh modules and grown on successfully.
Thinned Seedlings: Use Them, Don't Waste Them
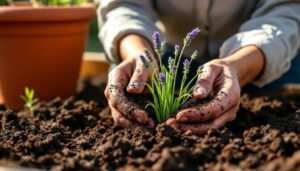
Before discarding thinnings, consider whether any can be transplanted or eaten. Lettuce and salad seedlings removed during thinning are often large enough to transplant into their own cells or a nursery row. Carrot and beetroot thinnings are too small and root-fragile to transplant reliably, but the tiny leaves of both are edible and make a fresh, delicate addition to spring salads. Basil thinnings transplant particularly well at the true-leaf stage if lifted with care and potted immediately into moist compost.
Thinnings that cannot be salvaged should be composted rather than left on the soil surface, where they can attract pests or harbour the early stages of fungal disease if conditions are humid.
Aftercare and What to Watch For
In the days following thinning, check surviving seedlings for signs of stress: wilting that does not recover by evening, yellowing of lower leaves, or leaning that was not present before. A light misting of the leaves and gentle watering at the base is usually sufficient to re-establish stability. Under a cold frame or on a windowsill, ensure ventilation is adequate — reduced competition means slightly less moisture being drawn from the compost, which slightly increases the risk of fungal issues if air circulation is poor.
Within a week of thinning, healthy seedlings should show noticeably improved vigour: deeper colour, wider leaf spread, and steadier upright growth. This visible response is one of the clearest confirmations that the process worked.
For Further Reading
Thinning connects directly to decisions about seed sowing density, module size, and the timing of potting on. Gardeners who consistently sow one or two seeds per module rather than scattering generously across a tray find that thinning becomes a minor task rather than a large one — a useful habit to develop for the seasons ahead. Those growing from pelleted seed, where individual placement is easier, rarely need to thin at all.
No regulatory requirements apply to thinning seedlings at home. For allotment holders or community gardeners, plot rules occasionally specify when structures or crops must be established, but thinning itself falls entirely within the gardener's discretion.
Frequently Asked Questions
Does thinning hurt the remaining seedlings?
Done at the right stage — when true leaves have just appeared and roots are still shallow — thinning causes minimal disruption to surviving plants. Using scissors rather than pulling reduces root disturbance further. Most seedlings show no visible stress within 24 to 48 hours, and growth typically accelerates noticeably within a week as competition for resources is removed.
What happens if you never thin seedlings?
Overcrowded seedlings compete intensely for light, water, and nutrients. The result is typically a group of weak, leggy plants with underdeveloped root systems, all of which perform poorly after transplanting. Crops like carrots and beetroot grown without thinning produce forked, distorted roots or fail to form properly at all. For flowers, overcrowding leads to poor flowering and increased disease pressure.
Can you thin seedlings too early?
Thinning at the seed-leaf stage is possible but slightly wasteful — it is harder to judge which seedling is strongest when only the cotyledons are visible. Waiting for the first true leaves gives a much clearer picture of plant vigour. The exception is very densely sown trays where overcrowding is already causing etiolation even at the cotyledon stage, in which case early intervention is worthwhile.
Should you thin seedlings started indoors differently from those sown outside?
The principle is the same, but indoor seedlings in module trays are typically thinned to one plant per cell, while outdoor direct-sown rows are thinned to a spacing measured in centimetres. Outdoor thinning is often done in two stages over several weeks, while indoor module trays are usually finalised in a single session at the true-leaf stage. Outdoor seedlings may also need more decisive action as ground competition from weeds adds further pressure.
Which crops need thinning most urgently?
Root vegetables — carrots, parsnips, beetroot, turnips — are the most sensitive to overcrowding and should be thinned without delay once true leaves appear, since their roots deform quickly in confined conditions. Cucurbits such as courgettes, cucumbers, and squash are also high priority, as they grow rapidly and competition between plants intensifies fast. Lettuces forming hearts, sweetcorn, and most annual flowers grown for cutting all benefit significantly from prompt thinning.