

March arrives and the garden stirs. After months of dormancy, perennials are pushing their first tentative shoots through the cold soil, and what you do with them right now — in these precise early-spring weeks — will shape their entire growing season. This is the window that experienced gardeners know better than any other: narrow, weather-dependent, and quietly decisive. Get it right and your borders will reward you with stronger stems, denser clumps, and more flowers than the year before.
The six tasks below are not optional extras. They are the backbone of good perennial management in early spring, drawn from sound horticultural practice and the rhythms of the season itself. None of them requires specialist equipment or advanced skill — only a little time, the right tools, and an understanding of why each step matters. The ground is still cold underfoot, the mornings sharp, but the light is lengthening. It is exactly the right moment to get started.
| Time to complete all 6 tasks | 3–5 hours across one or two sessions |
| Difficulty | Beginner to Intermediate |
| Recommended season | Early spring (March) |
| Tools required | See list below |
| Estimated cost | £20–£60 / $25–$75 depending on supplies needed |
Tools and supplies you will need
- Sharp pair of garden scissors or secateurs
- Garden fork or border fork
- Hand trowel and a flat spade
- Well-rotted garden compost or manure
- Balanced slow-release granular fertiliser (general-purpose or specific to flowering perennials)
- Horticultural grit or coarse gravel (for mulching around drought-tolerant varieties)
- Garden gloves and kneeling pad
- Watering can or garden hose with gentle rose attachment
- Plant labels and a waterproof marker pen
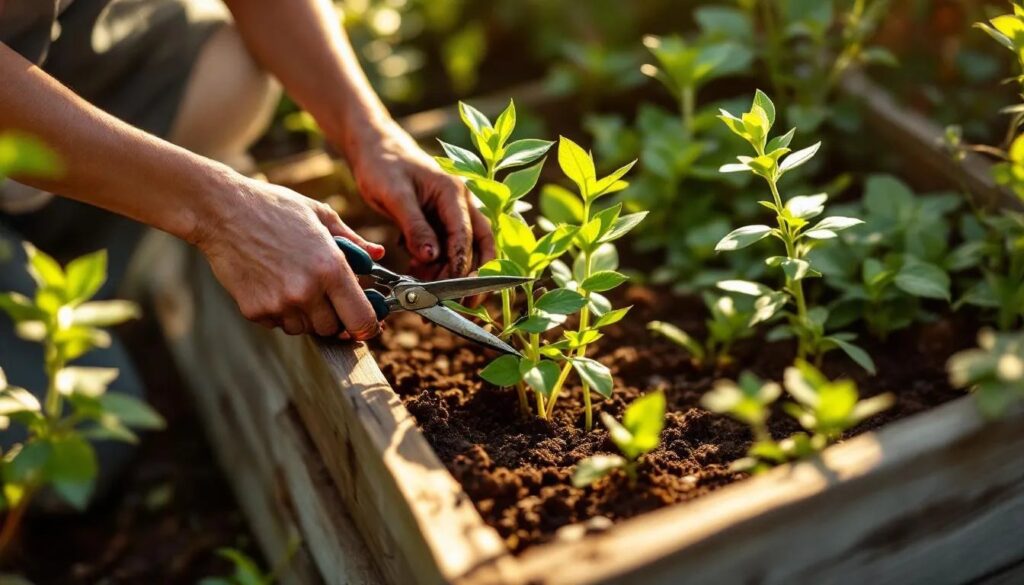
Task 1: Cut back last year's dead growth
The first job is the most visible — and the most satisfying. Many gardeners leave perennial stems standing through winter, which is good practice: hollow and pithy stems shelter overwintering insects, and the seed heads feed birds during the leanest months. By mid-March, though, that purpose is largely spent, and the old growth begins to compete with emerging new shoots for light and air. Work through each clump methodically, cutting dead stems down to within a few centimetres of the soil. Use sharp, clean secateurs — blunt blades crush rather than cut, leaving ragged entry points for disease. As you remove the dry material, look closely at the base of each plant: you should see tight, fresh shoots already pressing upward, often flushed with red, bronze or vivid green depending on the species. These are your indicators that the plant has overwintered successfully. Leave them completely untouched. Add the cut stems and dead foliage to your compost heap, unless any show signs of disease, in which case bag them for garden waste collection.
Task 2: Weed thoroughly around each crown
Early spring is the single most effective moment to weed perennial beds, and the reason is straightforward: most perennials are still compact at the base, giving you unobstructed access to the soil between plants. Weeds, by contrast, have often been growing quietly all winter — hairy bittercress (Cardamine hirsuta), chickweed (Stellaria media) and ground elder (Aegopodium podagraria) are all capable of establishing firm root systems before a perennial border shows any real growth. Get down low and work with a hand trowel, removing each weed with its entire root system. For perennial weeds like bindweed or couch grass, be especially thorough: even a small fragment of root left in the ground will regenerate. Once the bed is clear, avoid disturbing the soil more than necessary — excessive turning brings dormant weed seeds to the surface and triggers germination. A light, careful pass is all that is needed.
Task 3: Divide overcrowded clumps
Division is the most transformative task in perennial management, and March — before significant leaf development — is one of the two best times of year to do it (the other being early autumn). Over three to five years, most perennials expand outward from the centre, and the oldest growth at the heart of the clump gradually weakens. Flowering becomes sparse, stems grow shorter, and the plant loses the vigour it once had. Division reverses all of that. Using a flat spade or a border fork, lift the entire clump from the soil, working around its perimeter to loosen the roots before levering it free. Once out, examine it: the outer sections, where growth is dense and healthy, are the portions worth replanting. The woody, exhausted centre can go to the compost. Split the healthy outer sections into smaller pieces using two garden forks placed back-to-back — the back-to-back fork method allows you to prise sections apart without severing roots with a blade. Each division should have a minimum of three to five healthy shoots and a good root system. Replant immediately at the same depth the plant sat before, firm in well, and water thoroughly.
Perennials that respond particularly well to March division include geraniums, hostas, rudbeckias, salvias, sedums, astrantias and heleniums. Hold off on dividing spring-flowering perennials — primulas and pulmonarias, for instance — until they have finished blooming.
Task 4: Feed with a balanced spring fertiliser
After the physical work of cutting back and dividing, feeding is the step that sets the pace for the whole growing season. Perennials are hungry plants. Their job is to build substantial root systems, produce abundant foliage and flower prolifically — all of which demands a steady supply of nutrients. Apply a balanced granular fertiliser around each plant now, following the manufacturer's recommended rate. Scatter it evenly over the soil surface, extending to roughly the same diameter as the plant's spread, and work it very lightly into the top centimetre of soil with a hand fork. Avoid letting the granules sit directly against the crown of the plant, as concentrated fertiliser in contact with fresh shoots can cause scorching. If you prefer an organic approach, a top-dressing of well-rotted manure or garden compost spread around each clump at a depth of 5–7 cm serves a dual purpose: it delivers a slow, steady release of nutrients as it breaks down, and it also acts as a moisture-retaining mulch.
Task 5: Apply a mulch to lock in moisture and suppress weeds
Mulching in March — while the soil still holds some winter moisture — is considerably more effective than mulching in May, when the surface has already begun to dry out. A 5–8 cm layer of organic material laid over the cleared, fed soil around your perennials will suppress weed germination, regulate soil temperature, protect newly emerging roots from any late frosts, and gradually improve soil structure as it decomposes. Well-rotted garden compost, leaf mould, bark chippings or composted wood chip all work well. Keep the mulch clear of direct contact with plant crowns and stems to allow air circulation and prevent the risk of rot — the classic approach is to think of it as a ring or doughnut shape around each plant rather than a mound banked up against it. For Mediterranean-origin perennials such as eryngiums, echinaceas and kniphofias that naturally prefer free-draining conditions, substitute horticultural grit for organic mulch: it dresses the surface, deters slugs and prevents moisture sitting around the crown.
Task 6: Label any plants that were not already marked
It sounds minor, but unlabelled perennials cause genuine problems in March. When a border contains nothing but bare soil and emerging shoots the size of a thumb, it is extraordinarily easy to accidentally fork through a crown you had forgotten was there, or to mistake a desirable plant for a weed. Take ten minutes now, before growth advances further, to walk every bed and push a durable label — not a flimsy paper tag — beside any plant that is not already identified. Write the genus, species and, if you know it, the cultivar name, along with the year of planting. This small discipline pays dividends every year thereafter: when you come to divide, move or propagate, the information is already there. If you cannot identify a plant from its emerging shoots alone, photograph it now and again in full growth later in the season — apps such as PlantNet can assist, or compare against photographs taken the previous summer.
The professional's insight
Experienced nursery growers often stress one point that amateur gardeners overlook: timing within March matters. Aim to complete the more invasive tasks — division and deep weeding — during a mild, dry spell when the soil is workable but not waterlogged. Working heavy, compacted soil when it is saturated causes structural damage that takes months to recover. If March brings a prolonged wet period in your area, wait. A week's delay is far less costly than a season of compacted, poorly-aerated soil. Equally, if a late frost is forecast for your area — always possible in early spring — hold off mulching until the cold snap passes, as mulch can trap ground frost and slow warming of the soil around new growth.
Ongoing care through spring
Once these six tasks are complete, your perennials need relatively little intervention through April and into May. Water during any extended dry spells, targeting the base of each plant rather than the foliage. As growth advances and stems begin to reach height, assess which plants will need staking — tall late-season perennials such as delphiniums, veronicastrums and tall phlox benefit from supports placed early, before the stems grow into and around them. Check back every fortnight to pull any weeds that have germinated through the mulch; tackled young, they take seconds to remove.
By mid-spring, the results of your March work will be tangible: stronger, more upright growth, cleaner soil between plants, and a border that already has the structure of a well-managed, productive garden.
Going further
If you have divided generously and find yourself with surplus plants, early spring divisions transplant very well, making them excellent candidates for passing on to neighbours, contributing to a community garden, or establishing a new border elsewhere on your property. Hardy perennials are among the most generous plants in any garden economy — one mature clump can, over several years, furnish an entire border at minimal cost. For gardeners working with limited space or containers, many compact perennials — heucheras, dwarf sedums, smaller salvias — can be managed in large pots using the same March tasks adapted to a smaller scale: cut back, refresh the compost, top-dress with fertiliser, and repot into a slightly larger container if the roots are congested.
Frequently asked questions
Which perennials should not be divided in March?
Spring-flowering perennials are best left until after they have bloomed. Primulas, pulmonarias, hellebores and bergenia are among the plants that are actively working in March and early April to produce their flowers; dividing them now would interrupt that process and cause unnecessary stress. Wait until flowering is completely finished, then divide and replant during a cool, overcast spell to reduce transplant shock. Similarly, ornamental grasses are better divided slightly later in spring, once new growth is clearly visible and the risk of severe frost has passed.
Can I use any type of compost as mulch around perennials?
Well-rotted garden compost or well-rotted manure are the most beneficial options, as they feed the soil as they break down. Fresh or incompletely composted material can introduce weed seeds, may tie up soil nitrogen as it decomposes, and can sometimes harbour pathogens. Bark chippings and composted wood chip are effective for weed suppression but add fewer nutrients. Peat-based products are best avoided for environmental reasons, and have largely been phased out in UK commercial horticulture. Leaf mould — made from composted autumn leaves — is an excellent, free alternative for gardeners who collect and compost their own.
My perennials barely grew last year — will these tasks help?
Poor performance in the previous season usually comes down to one of three factors: poor soil nutrition, competition from weeds or neighbouring plants, or overcrowding at the root. All three are directly addressed by the March tasks above. Division, feeding and thorough weeding together deliver the reset that a struggling plant needs. If the problem persists after a full season of good care, it is worth investigating soil drainage — waterlogged soil through winter is a common and often underestimated cause of perennial decline, particularly on heavy clay soils.
Is it possible to do too much to perennials in March?
Yes — over-intervention is a real risk, particularly with division. Not every perennial needs dividing every year, and disturbing a plant that is still performing well can set it back temporarily. A good rule of thumb: divide when flowering has noticeably declined over two consecutive seasons, or when the clump has visibly spread beyond the space allotted to it. Plants that are flowering strongly and growing compactly are generally best left alone and simply cut back, fed and mulched. Less intervention, done at the right time, is almost always preferable to excessive management.
Should I water perennials in March after completing these tasks?
If March brings reasonable rainfall — typical across much of the UK and northern Europe — supplementary watering after mulching and replanting is usually unnecessary. However, if you are dividing and replanting in a dry spell, water each division in thoroughly immediately after planting: this settles the soil around the roots and prevents air pockets from forming. In drier climates or during an unusually dry March, check the soil moisture at a depth of 5–8 cm every few days; if it feels dry at that depth, water gently and deeply rather than giving frequent shallow drinks.