


March marks a turning point for peace lilies. As daylight hours lengthen and indoor temperatures begin to stabilise after winter, Spathiphyllum — the botanical name for the peace lily — stirs back into active growth. This is the moment to act: what you do now will directly influence how generously the plant flowers through spring and into summer.
Peace lilies are forgiving houseplants, but they respond dramatically to attentive care at the right time. A few targeted actions in March — repotting if needed, adjusting watering rhythm, feeding for the first time since autumn, and positioning the plant correctly for the changing light — can mean the difference between a tired, pale display and a plant covered in those distinctive white spathes. Roll up your sleeves and give yours the fresh start it deserves.
| Time required | 30–60 minutes across the month |
| Difficulty | Beginner |
| Recommended season | Early spring (March) |
| Frequency | Annual spring routine |
Check the roots before anything else
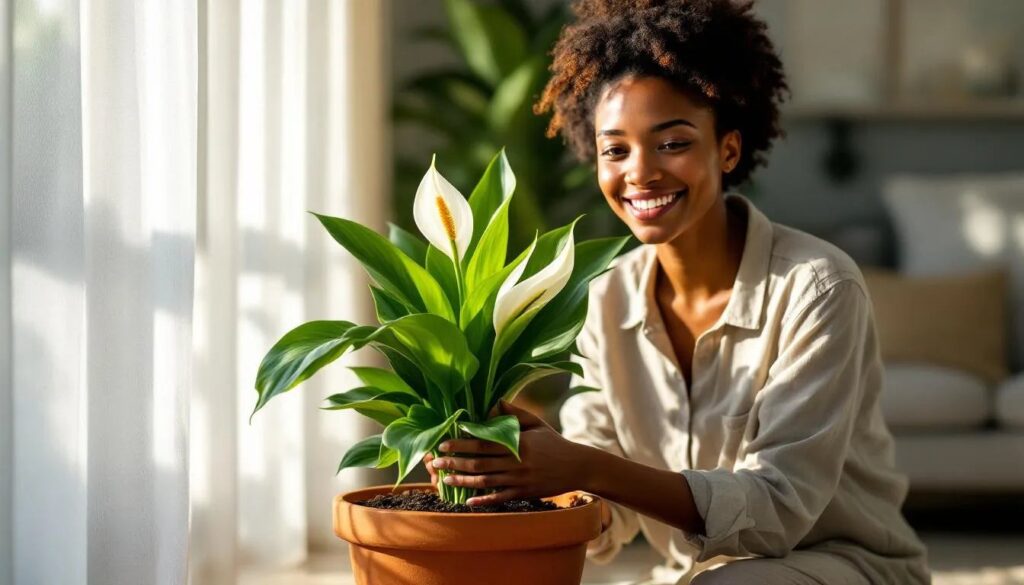
Before adjusting light, water or feed, tip the plant gently out of its pot and look at the root ball. Peace lilies send out thick, pale roots that fill their container quickly. If the roots are visibly circling the base of the pot, pushing through the drainage holes, or if the compost feels bone-dry within a day of watering, the plant is root-bound — meaning it has outgrown its current home. March is the ideal time to address this because the plant is entering its growth phase and will recover quickly.
Choose a new pot that is one size larger — roughly 5 cm wider in diameter than the current one. Go no larger than that: peace lilies actually bloom more readily when their roots are slightly snug. A pot with drainage holes is non-negotiable. Use a peat-free, well-draining houseplant compost, ideally one formulated for tropical plants. Loosen the root ball gently with your fingers before settling it into the new container, making sure the base of the stems sits at the same depth as before. Firm the compost lightly, water thoroughly, and let the pot drain completely before returning it to its spot.
Reassess the light situation
Peace lilies are often described as low-light plants, and while they tolerate shade better than most flowering houseplants, tolerating low light is not the same as thriving in it. In winter, a dim corner may have been fine. In March, that same corner receives noticeably more light as the sun rises higher — but it may still not be enough to trigger flowering.
Move the plant to a position where it receives bright, indirect light for the majority of the day. A spot set back from an east-facing or north-facing window works well in most UK and northern European homes. Avoid placing it in direct sun: the broad, dark green leaves scorch quickly, and brown patches on the foliage are one of the most common problems at this time of year. If the leaves begin to yellow and the plant fails to produce any new growth through spring, insufficient light is almost always the cause.
Adjust your watering rhythm
Through the winter months, a peace lily needs far less water than it does during active growth. March is the moment to recalibrate. As temperatures begin to rise and the plant starts pushing new leaves, its water requirements increase — but the shift should be gradual, not sudden.
The most reliable method is to water when the top 2–3 cm of compost feel dry to the touch. Peace lilies will tell you clearly when they are thirsty: the leaves begin to droop slightly, taking on a softly wilted appearance. This early wilt is not harmful and actually signals that the plant is ready for a thorough drink. Water until it flows freely from the drainage holes, then discard any water that collects in the saucer after 30 minutes. Standing in water causes root rot, which is the most common way a peace lily is killed indoors. If your tap water is heavily chlorinated or very hard, leaving it in a jug overnight before use is a simple improvement worth making.
Begin feeding for the season
Peace lilies should not be fed during their winter rest — doing so pushes weak, soft growth that the plant struggles to support. March signals the end of that dormancy. From now until September, a balanced liquid fertiliser applied every four weeks will support healthy leaf production and encourage flowering.
Use a houseplant fertiliser with a balanced NPK ratio, or one slightly higher in phosphorus to promote blooms. Dilute it to half the recommended strength for the first application of the season — the roots are waking up gradually and a full dose can cause fertiliser burn, which shows up as brown leaf tips. Full-strength feeding can begin from April onwards once the plant is clearly in active growth.
Clean the leaves and check for pests
Over winter, dust settles on the broad leaves of a peace lily and reduces its ability to photosynthesise effectively. Take a damp cloth and gently wipe each leaf — both the upper surface and the underside. This is also the best moment to inspect for pests that take advantage of dry indoor air during the heating season.
Spider mites leave fine webbing on the undersides of leaves and cause a pale, stippled texture across the surface. Mealybugs cluster in the leaf axils and look like small tufts of white cotton. Both are easier to deal with when caught early. A cloth dampened with a dilute solution of washing-up liquid and water is effective for mild infestations. For persistent problems, a ready-to-use insecticidal soap spray works without harming the plant.
Deadhead spent flowers and remove yellowing leaves
Any flowers or spathes that faded over winter should be removed at the base of their stem using clean scissors or secateurs. Leaving spent flower stems in place draws energy away from new growth. Similarly, any yellowing or browning leaves should be cut cleanly at the base — not torn, as tearing can introduce disease. March tidying gives the plant a clean visual slate and removes potential sites for fungal problems as humidity rises with the warmer months ahead.
The professional's tip
Peace lilies flower most generously when they experience a very slight temperature drop at night — somewhere between 15 °C and 18 °C overnight versus 20–22 °C during the day mimics the natural conditions of their tropical forest habitat. In March, positioning the plant near a window that cools slightly at night (without cold draughts) can be enough to stimulate flowering. Avoid positioning it directly above a radiator, where constant dry heat will stress the plant and cause the leaf tips to brown regardless of how carefully you water.
What to expect through spring
A peace lily that receives the right care in March typically begins showing new growth within two to three weeks: fresh, bright green leaves unfurling from the centre of the plant. Flower buds, which emerge as pale green pointed spikes, usually appear between April and June in most indoor environments. If no flowers appear by midsummer, reassess the light levels first, then consider whether the pot size is limiting the plant.
Peace lilies are not difficult to keep looking their best, but they reward consistency. A well-established plant that is repotted, fed and positioned correctly in March can easily live for a decade or more, growing into a substantial specimen that flowers reliably every spring.
For further reading
If your peace lily has been in the same pot for more than two years, this March is the right moment to repot regardless of whether it looks root-bound. Older compost loses its structure and drainage capacity over time, becoming compacted and water-retentive in ways that promote root problems. Refreshing the growing medium is one of the most effective things you can do for a long-established plant.
Peace lilies are also mildly toxic to pets and children if ingested, causing oral irritation and discomfort. This is worth keeping in mind when choosing where to position the plant, particularly in homes with cats, who are drawn to the soft, broad foliage.
Frequently asked questions
Why is my peace lily not flowering even with good care?
Insufficient light is the most common reason. Peace lilies need bright, indirect light to produce flowers — a dark corner may keep the plant alive but will rarely produce blooms. Move it closer to a window and wait four to six weeks. Age and pot size also matter: a severely root-bound plant or one in very old, depleted compost will put its energy into survival rather than flowering.
Should I mist my peace lily in spring?
Misting provides only short-term humidity and can encourage fungal spots on the leaves if water sits on the surface too long. A more effective approach is to place the pot on a tray filled with pebbles and water, so the base of the pot sits above the waterline. As the water evaporates, it raises humidity immediately around the plant without wetting the foliage directly.
My peace lily's leaf tips are brown — is this a watering problem?
Brown tips are almost always caused by one of three things: water quality (particularly fluoride and chlorine in tap water), low humidity, or irregular watering. Try switching to filtered or overnight-rested tap water, increase ambient humidity with a pebble tray, and ensure the compost never dries out completely between waterings. Inconsistent moisture — wet then very dry, wet then very dry — is harder on peace lilies than either steady moisture or slight dryness alone.
Can I divide my peace lily in March?
Yes — March is an excellent time to divide a large, multi-stemmed peace lily. Slide the plant out of its pot and gently separate the root clumps by hand, teasing them apart rather than cutting where possible. Each division should have at least three to four healthy leaves and a good portion of roots. Pot each division into its own container with fresh compost, water well, and keep out of direct sunlight for a week while they settle.
How do I know if my peace lily needs repotting or just fresh compost?
If the roots are visibly emerging from the drainage holes or circling tightly around the base of the root ball, repotting into a larger container is the right move. If the root system still fits comfortably within the current pot but the compost is old and compacted, you can top-dress instead: remove the top 5 cm of old compost carefully and replace it with fresh, well-draining houseplant mix. This refreshes the growing medium without disturbing established roots.